


Adding a Second Story to a House: Cost and Planning Guide

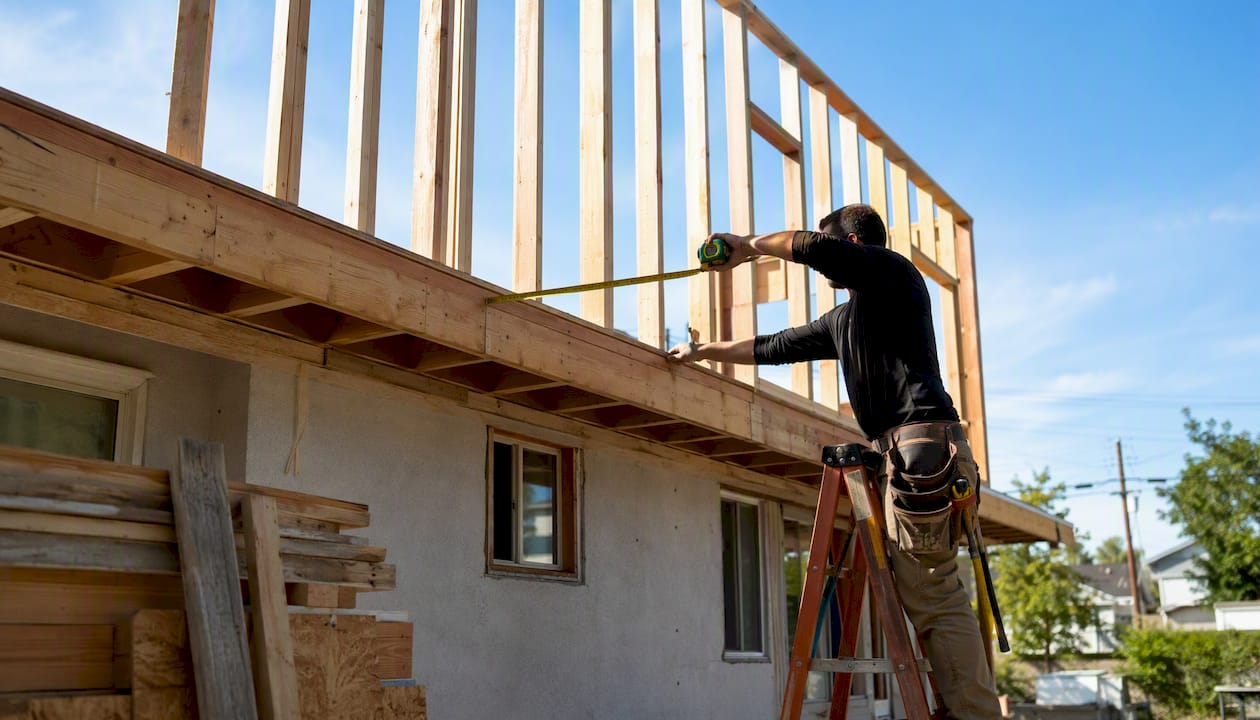
Most U.S. homes can support a second-story addition, but feasibility depends on three things: foundation capacity, existing framing quality, and local zoning rules. The national cost range runs from roughly $80,000 to $600,000, with many projects landing near $175,000 and per-square-foot planning bands of $100–$300 for most scopes. Before you spend a dollar on design, hire a licensed structural engineer for a readiness assessment. That single step tells you whether your project is straightforward or whether it carries hidden costs that could reshape your entire budget.
Building up is often the most practical way to gain square footage without sacrificing yard space or relocating. As This Old House notes, homeowners who build vertically keep their neighborhood, their lot, and their community while gaining the space their family needs. That trade-off is worth understanding before you decide.
Key Takeaways
Adding a second story to a house is feasible for most U.S. homes.
Point | Details |
Typical cost range | Most projects fall between $80,000 and $600,000, with many clustering near $175,000. |
Per-square-foot benchmark | Plan on $100–$300 per sq ft for most scopes; full additions in high-cost markets reach $200–$500. |
First professional to hire | A licensed structural engineer; their report shapes every design and budget decision that follows. |
Realistic timeline | Partial additions commonly take several months to complete; full second-story additions typically require a longer timeline. |
Djcustomcontracting’s role | Full-service GC managing structural assessment, permits, and construction through certificate of occupancy. |
Table of Contents
How much does it cost to add a second story to a house?
Cost is the first question every homeowner asks, and the honest answer is that the range is wide because the variables are significant.
HomeAdvisor’s national data puts the typical range at $80,000 to $600,000, with a frequently cited average near $175,000. Angi’s published figures align closely, placing many projects between $100,000 and $250,000 when foundation conditions are favorable and room choices stay moderate. At the higher end, Forbes reports ranges up to $600,000 and beyond for full second-story builds in high-cost markets or projects with premium finishes.
Per-square-foot benchmarks help set realistic expectations. HomeGuide’s analysis models full second-floor additions at $200–$500 per square foot in many markets, while partial additions and bonus rooms often fall closer to $100–$200 per square foot. Labor can make up a substantial portion of the total budget and local labor rates are a significant variable from one region to the next.
What drives the cost up or down?
The factors below create most of the spread between a $100,000 project and a $400,000 one:
Foundation work: If the existing foundation cannot carry the added load, reinforcement or underpinning can add $10,000–$50,000 or more before framing begins.
Structural reinforcement: Older framing, undersized beams, or load-bearing wall reconfiguration adds both engineering fees and labor costs.
Plumbing and electrical: Running new supply lines, drain stacks, and electrical panels to a second floor is expensive, especially when a bathroom or kitchen is included.
Finishes: Standard finishes cost far less than custom millwork, tile, or high-end fixtures. This single category can shift a budget by tens of thousands of dollars.
Permits and fees: Permit costs vary widely by municipality, from a few hundred dollars to several thousand, depending on project scope and jurisdiction.
Temporary housing: If the roof is removed during construction, you will need to vacate. Short-term rental costs for three to six months add $5,000–$20,000 depending on your market.
Sample cost scenarios
These figures are planning estimates. Your actual cost depends on local labor rates, foundation condition, and the specific rooms you add.
Is your house structurally ready for a second story?
The structural readiness question is where many projects stall or get expensive. A licensed structural engineer will evaluate several specific elements before any design work begins.
What the engineer inspects:
Footings and foundation walls: Are they deep enough, wide enough, and reinforced with rebar to carry additional load?
Slab type: Slab-on-grade foundations often require more engineering analysis than basement or crawlspace foundations.
Soil conditions: Expansive clay soils or poorly compacted fill can shift under added weight, requiring soil remediation or deep piers.
Existing wall framing: Are the walls load-bearing, and are the studs sized to carry vertical loads from above?
Floor joists and beams: The existing ceiling structure often becomes the second-floor subfloor, and it may need sistering or replacement.
A structural engineer’s report is not optional. Feasibility depends on foundation type (basement, crawlspace, or slab), framing quality, and soil conditions. Skipping this step is the single most common reason second-story projects run over budget. As Patrick A. Finn’s design-build guide makes clear, a professional evaluation is the required first paid step before any design or permitting work begins.
Ranch-style homes are among the most common candidates for vertical expansion because their wide, single-story footprints offer a clean base for a new upper level. However, many ranches were built with minimal foundation depth and lightweight framing, which means reinforcement is frequently required. Signs that your home may need additional structural work include visible foundation cracks, uneven floors, doors that stick seasonally, or any evidence of settlement.
When foundation reinforcement becomes necessary, costs typically range from $10,000 for minor underpinning to $50,000 or more for full perimeter work or helical pier installation. House-lifting, which is sometimes needed to access and reinforce the foundation perimeter, adds further cost and timeline.
Pro Tip: Before hiring an engineer, walk your home’s perimeter and photograph any foundation cracks, efflorescence (white mineral deposits on concrete), or areas where the grade slopes toward the house. These photos give the engineer a faster starting point and can reduce the time billed for the initial site visit.
What are your options for adding vertical space?
There are at least four widely used methods for expanding a home vertically, and each carries a different cost, timeline, and disruption profile.
Full second-story addition
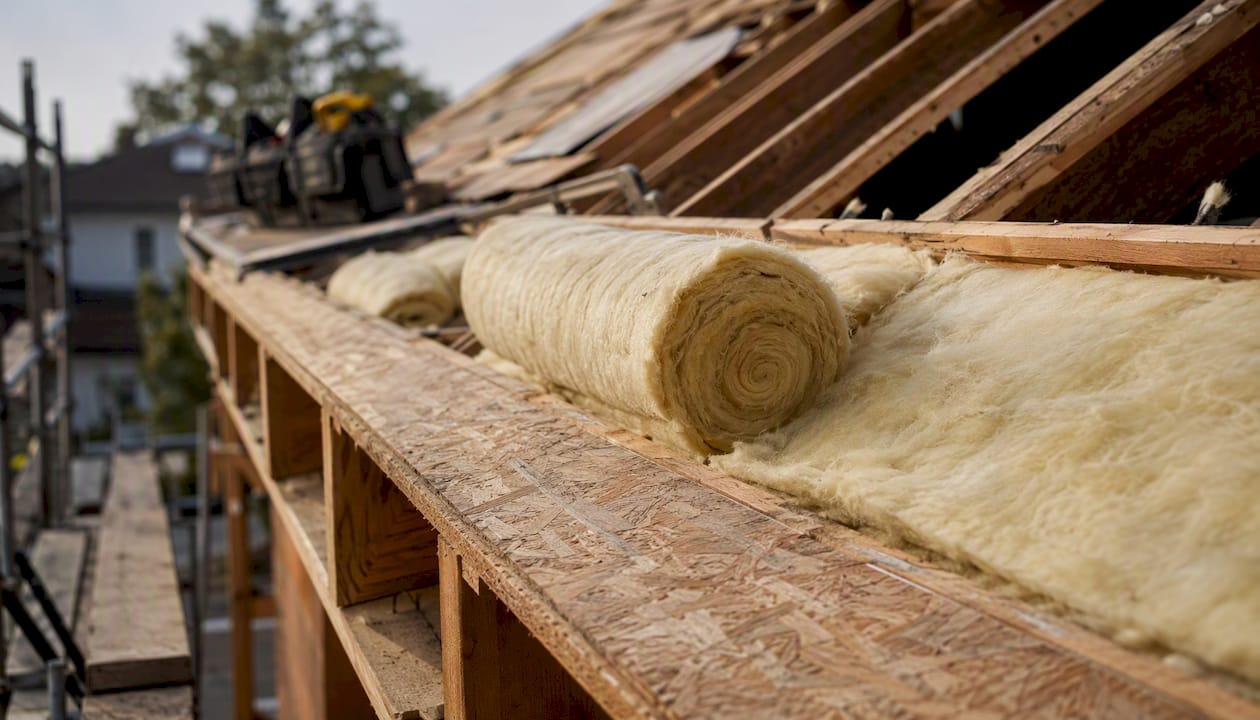
The roof is removed entirely, and a complete new floor is built over the existing structure. This method maximizes square footage and works well when the footprint is large enough to justify the investment. It is also the most disruptive: the home is essentially uninhabitable during the roof-off phase, which typically lasts several weeks.
Best for: Homeowners who want to double their living space and whose foundation can support the full load.
Partial second-story addition
Only a portion of the roof is removed, typically over a garage, a single wing, or a rear section of the house. This approach costs substantially less than a full addition and allows the rest of the home to remain livable during construction.
Best for: Homeowners who need one or two additional bedrooms or a home office and want to minimize disruption.
Pop-top addition
A pop-top raises the roofline over a specific section of the home, often a single room or a small cluster of rooms, to create usable headroom above. It is common in bungalows and cottages where the existing attic space is too shallow for a standard conversion.
Best for: Homes with a compact footprint where a partial addition would still require significant structural work.
Modular or stacked addition
Prefabricated modules are manufactured off-site and craned into position. This method can reduce on-site construction time significantly, though it requires careful planning to integrate with existing mechanical systems and finishes.
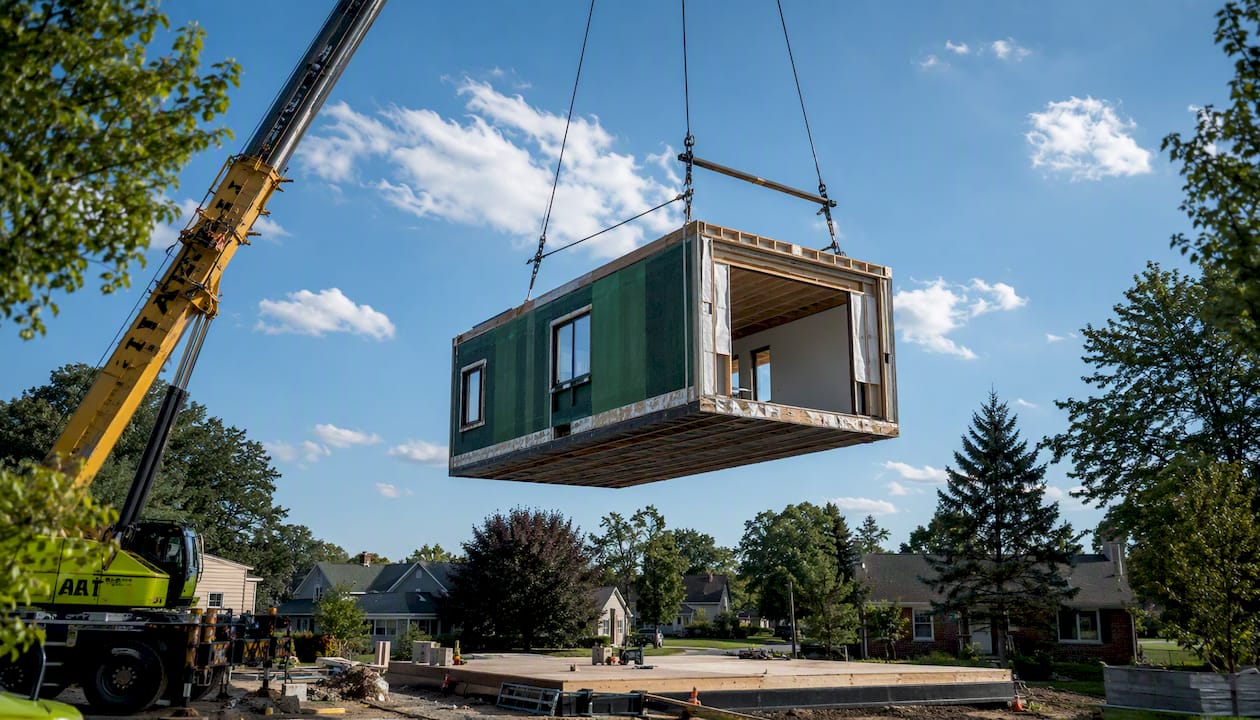
Best for: Homeowners with tight timelines or sites with limited staging space.
Attic-to-living conversion
When the existing attic has sufficient height (typically 7.5 feet or more at the ridge) and the floor joists are sized for live loads, converting the attic is the least disruptive and often the least expensive path to a second floor. No roof removal is required.
Best for: Homes with a usable attic and a homeowner who wants minimal construction disruption.
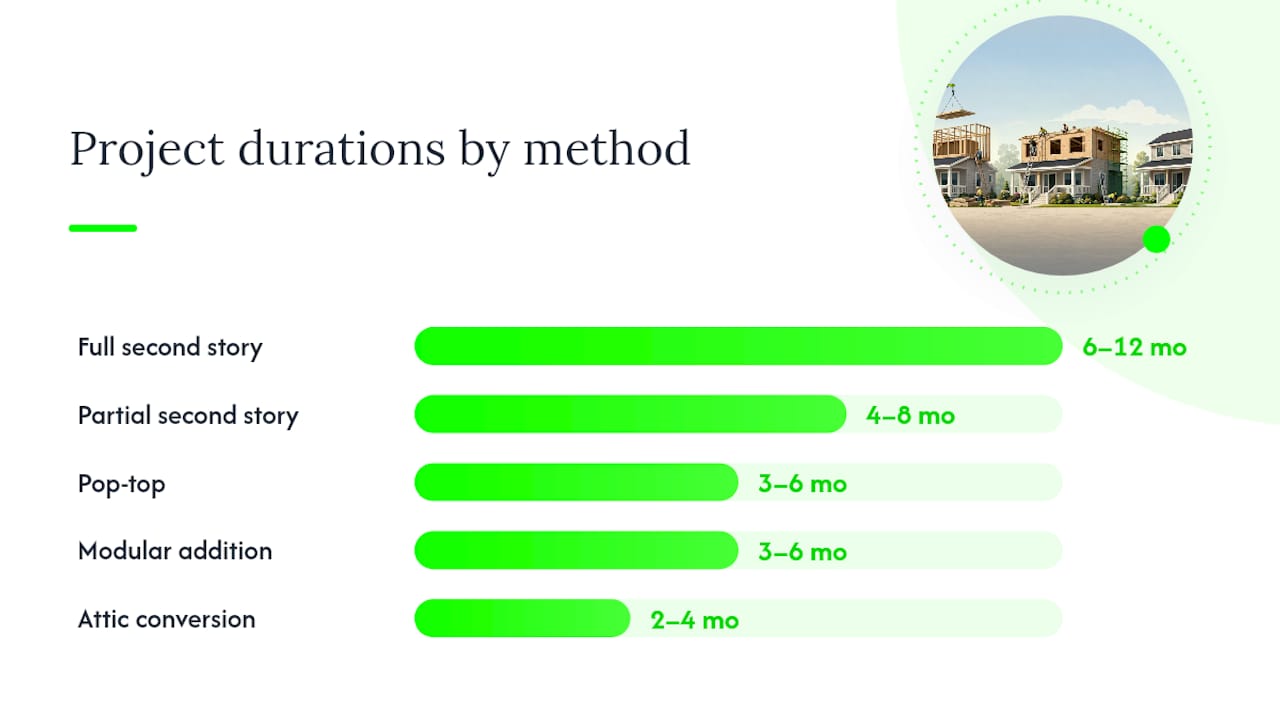
Method | Relative Cost | Disruption Level | Timeline |
Full second story | Highest | High (vacate required) | 6–12 months |
Partial second story | Moderate | Moderate | 4–8 months |
Pop-top | Moderate | Moderate | 3–6 months |
Modular addition | Moderate to high | Lower on-site | 3–6 months |
Attic conversion | Lowest | Low | 2–4 months |
For tips on maximizing the space in your new addition, thoughtful layout planning during the design phase pays dividends once construction is complete.
What permits, zoning rules, and HOA restrictions apply?
Permits and zoning constraints are not administrative formalities. They are structural guardrails, and discovering a height restriction or HOA covenant after you have paid for design drawings is an expensive mistake.
Check zoning and HOA rules before you pay for a single drawing. Height limits, floor-area ratio (FAR) caps, setback requirements, and ridge-height restrictions can all make a second-story addition impossible or require a variance process that adds months and thousands of dollars to the project. Many municipalities publish their zoning codes online; your local planning department can confirm what applies to your specific parcel.
What to check before design begins
Zoning constraints to verify:
Maximum building height (often 25–35 feet in residential zones)
Floor-area ratio limits, which cap total square footage relative to lot size
Setback requirements that may restrict how far the addition can extend
Ridge height limits in historic districts or overlay zones
HOA restrictions to review:
Architectural review committee approval requirements
Style and material standards that may affect roofline design
Neighbor notification requirements
Permit process overview:
Most second-story additions require a building permit, a structural permit, and separate mechanical, electrical, and plumbing permits. In most jurisdictions, the general contractor pulls the permits, though owner-builders may do so themselves. Permit fees vary widely: a modest addition in a small municipality might cost $500–$2,000, while a full second story in a major metro can run $5,000–$15,000 or more.
Inspection checkpoints typically include foundation review (if reinforcement is done), framing inspection, rough-in inspections for MEP systems, insulation inspection, and final inspection before a certificate of occupancy is issued. Missing an inspection or failing one adds time and, sometimes, cost for remediation.
For homeowners in the New York and New Jersey area, local permit and zoning nuances differ meaningfully from suburban and rural jurisdictions, and understanding those differences early prevents costly redesigns.
What does the project timeline look like from start to finish?
A second-story addition moves through predictable phases, but the duration of each phase depends on project scope, permit backlog, and material availability.
Feasibility and structural assessment (2–4 weeks): The structural engineer visits the site, reviews foundation and framing, and delivers a written report. This report becomes the basis for the architect’s design.
Design and engineering (6–12 weeks): The architect produces schematic drawings, the structural engineer produces stamped structural drawings, and the two documents are coordinated before permit submission.
Permit review and approval (4–16 weeks): Permit timelines vary dramatically by jurisdiction. Some municipalities review residential permits in four weeks; others have backlogs exceeding four months. Plan conservatively.
Demolition and framing (3–6 weeks): The roof is removed (for full or partial additions), temporary weather protection is installed, and the new floor system and walls are framed. This is the highest-disruption phase.
Mechanical, electrical, and plumbing rough-ins (3–5 weeks): HVAC ducts, electrical wiring, and plumbing supply and drain lines are run before walls are closed. Each trade requires its own rough-in inspection.
Insulation and drywall (2–4 weeks): Insulation is installed and inspected, then drywall is hung, taped, and finished.
Finishes and fixtures (4–8 weeks): Flooring, trim, cabinetry, tile, fixtures, and paint are installed. This phase’s duration scales directly with finish complexity.
Final inspections and certificate of occupancy (1–3 weeks): The building department conducts final inspections for all trades. Any deficiencies must be corrected before the certificate is issued.
Total project duration: A partial second-story addition typically runs 6–9 months from engineer engagement to certificate of occupancy. A full second-story addition more commonly takes 10–14 months, and complex projects in high-permit-backlog jurisdictions can stretch to 18 months.
Common delay triggers include permit office backlogs, custom window or door lead times (sometimes 10–14 weeks), unexpected structural discoveries during demolition, and weather delays during the open-roof phase.
For a detailed construction-phase walkthrough, the step-by-step addition guide covers milestone sequencing and owner responsibilities at each stage.
Who should you hire, and what should the contract include?
Three professionals are non-negotiable on a second-story addition: a structural engineer, an architect or licensed designer, and a licensed general contractor. Each has a distinct role, and gaps in any one of them create risk.
Roles and responsibilities:
Structural engineer: Assesses existing structure, designs load-path modifications, and stamps drawings for permit submission. Not optional.
Architect or designer: Translates your program (rooms, layout, style) into permitted drawings. Some design-build firms combine this role with the GC.
General contractor: Manages the full construction process, pulls permits, hires and coordinates subcontractors, and is responsible for code compliance and schedule.
The lowest bid is rarely the best value. A GC who bids 20–30% below the field has either missed scope items, plans to use lower-quality materials, or will make up the difference through change orders. As Maresdow’s analysis of common second-story mistakes documents, underestimating structural scope is the most frequent cause of budget overruns. Compare bids line by line, not total to total.
Key interview questions for a GC:
How many second-story additions have you completed in the past three years?
Who will be on-site daily, and how do you communicate progress to the owner?
How do you handle change orders, and what is your markup on unforeseen work?
Can you provide references from similar projects and proof of current insurance?
Contract items to require:
Detailed scope of work with specific materials, brands, and specifications
Payment schedule tied to construction milestones, not calendar dates
Clear change-order process with written approval required before work proceeds
Proof of general liability and workers’ compensation insurance
Lien waiver requirements from all subcontractors and suppliers
Explicit statement of who is responsible for pulling each permit
Pro Tip: Ask every GC candidate for a copy of their standard subcontractor agreement. A contractor who manages subs with clear, written agreements is far less likely to have payment disputes that stall your project mid-construction.
For a broader look at structural addition examples and how experienced contractors approach engineering decisions, that resource illustrates real-world trade-offs across different house types.
How will construction affect your daily life?
The practical disruptions of a second-story build are significant, and underestimating them is a common source of stress and unplanned expense.
High-impact phases and their duration:
The roof-off phase of a full or partial addition is the most disruptive. During this period, the home is open to weather, and dust, debris, and noise make normal occupancy impractical. This phase typically lasts two to four weeks, though weather delays can extend it. Even after the roof is closed, active framing and rough-in work generates significant noise and dust for another six to ten weeks.
Temporary housing options:
Staying with family or friends is the lowest-cost option and works well for shorter disruption windows.
Short-term furnished rentals (Airbnb, VRBO, or corporate housing) offer more privacy but add $2,000–$6,000 per month depending on your market.
A partial-move strategy, where you occupy one section of the house while construction is confined to another, works for partial additions but requires careful site separation and dust barriers.
Site safety and neighbor considerations:
Active construction sites require perimeter fencing, especially if children or pets are present. Crane days, which are typically needed for modular additions or large structural lifts, require street access coordination and sometimes temporary lane closures. Notify neighbors before work begins; a brief conversation prevents most complaints and keeps relationships intact during a long project.
Staging and storage:
Furniture and belongings from affected rooms need to be moved before demolition begins. A portable storage container (PODS or similar) placed on the driveway is a practical solution that keeps belongings accessible without cluttering the site.
Pro Tip: Coordinate with your GC to schedule the noisiest work (demolition, framing, concrete) during weekday hours when neighbors are most likely to be away. This small courtesy reduces friction and keeps the project moving without complaint-driven work stoppages.
What does a detailed second-story budget look like?
Understanding where the money goes is as important as knowing the total. The line items below represent the major cost categories for a typical full second-story addition.
Three sample budget profiles:
Conservative partial addition (500 sq ft, 1 bedroom, no bath): $90,000–$130,000. Foundation is adequate, finishes are standard, no plumbing extension required.
Mid-range full second story (1,200 sq ft, 3 bedrooms, 2 baths): $200,000–$350,000. Some foundation reinforcement, standard-to-mid finishes, full MEP extension.
High-end full second story (1,500 sq ft, custom finishes, full bath and kitchen): $400,000–$600,000+. Premium materials, high-cost market, complex structural work.
Structural discoveries, permit revisions, and material price changes are routine on projects of this scale. Budget the contingency as a real line item, not a mental reserve.
For a step-by-step guide to building home additions that covers construction-phase cost management, that resource provides practical owner-facing guidance on tracking spend against milestones.
What are the most common problems, and how do you avoid them?
Second-story additions fail budgets and schedules for predictable reasons. Most of them are preventable.
The most expensive mistake on a second-story addition is skipping the structural engineer. As Maresdow’s review of common design mistakes documents, neglecting the original foundation and underestimating load-bearing requirements are the two most frequent causes of mid-project cost overruns. By the time these issues surface during construction, correcting them costs two to three times what early identification would have.
Common problems and their mitigations:
Underestimating structural needs: Commission the structural engineer before design begins, not after. The engineer’s report shapes the architect’s drawings, not the other way around.
Vague contracts: Require line-item scope, material specifications, and written change-order approval. A contract that says “second-story addition per plans” without specifications is a blank check.
Unexpected utility relocations: HVAC equipment, electrical panels, and plumbing stacks sometimes need to move to accommodate the new floor. Ask the engineer and GC to identify these conflicts during design.
Permit revision cycles: Submitting incomplete drawings triggers revision requests that add weeks. Invest in thorough permit drawings upfront.
Budget overruns from scope creep: Every upgrade decision made after the contract is signed becomes a change order with markup. Make finish decisions before signing, not during construction.
When a major unknown surfaces mid-project (a deteriorated foundation section, for example, or a buried utility), the right move is to pause, get a written assessment, and negotiate the cost change before authorizing work. A GC who pressures you to approve changes verbally and settle up later is a red flag.
What experienced contractors wish homeowners knew
The gap between a smooth second-story project and a difficult one usually comes down to preparation and communication, not budget size.
What makes a project run well:
Decisions made before demolition begins stay cheap. Decisions made during framing cost more. Decisions made during finish work are expensive. Lock in your layout, fixture selections, and finish materials before the GC mobilizes.
Material lead times are real. Custom windows, specialty doors, and certain HVAC equipment can take 8–14 weeks. Order them as soon as the permit is approved, not when the framing is done.
Site access matters more than homeowners expect. A GC who cannot get a delivery truck to the rear of the house will spend more time and charge more money. Clear the driveway, trim overhanging branches, and coordinate parking before work starts.
Inspections are not bureaucratic delays. They are the checkpoints that protect you legally and structurally. A GC who suggests skipping or rushing an inspection is not saving you time.
How a GC typically structures payment milestones:
Payment schedules on a well-run project tie disbursements to verified completion of phases, not to calendar dates. The final payment should never be released before the certificate is in hand.
Pro Tip: Keep a project log. Note every conversation, decision, and change-order discussion with the date and the names of who was present. This log is your protection if a dispute arises over scope or payment, and it costs nothing to maintain.
For homeowners who want to understand the benefits of residential additions beyond square footage, including equity impact and long-term value, that resource covers the ROI side of the decision.
A note on what this project actually demands
Adding a second story is one of the most complex residential projects a homeowner can undertake. The cost ranges are wide, the structural variables are real, and the timeline is longer than most people expect. But the projects that go well share a common pattern: the homeowner invested in the right professionals early, made decisions before construction began, and held the GC to a clear, detailed contract.
The homeowners who struggle are usually the ones who tried to save money on the structural engineer, signed a vague contract to get started quickly, or treated the contingency as optional. Those shortcuts cost far more to correct than they saved.
At Djcustomcontracting, the approach is straightforward: assess the structure honestly, plan the scope completely, and build it right the first time. If you are weighing whether a second-story addition makes sense for your home, a site assessment is the right starting point.
Djcustomcontracting handles second-story additions from assessment to certificate of occupancy

Djcustomcontracting is a licensed general contractor with experience managing the full scope of second-story additions: structural assessments, permit management, foundation reinforcement coordination, framing, MEP rough-ins, and finish work. Rather than hiring separate professionals and coordinating between them yourself, you get a single point of accountability from the first site visit through the final inspection.
The process starts with a site assessment to evaluate your foundation, framing, and zoning constraints before any design fees are committed. From there, Djcustomcontracting manages the architect and engineer coordination, pulls the required permits, and oversees every trade through to certificate of occupancy.
To discuss your project and request an estimate, visit the addition and alteration services page or reach out directly through the interior renovation contractor page to get started.
Sources
The resources below were used to build this guide and offer additional depth on costs, methods, and planning:
The single most important first investment: a paid structural engineering assessment. It costs $500–$2,000 and determines whether every other decision in this guide applies to your home.
Recommended


Comments