


1/2 Inch Threshold: Code First Curbless Shower Requirements for Owners

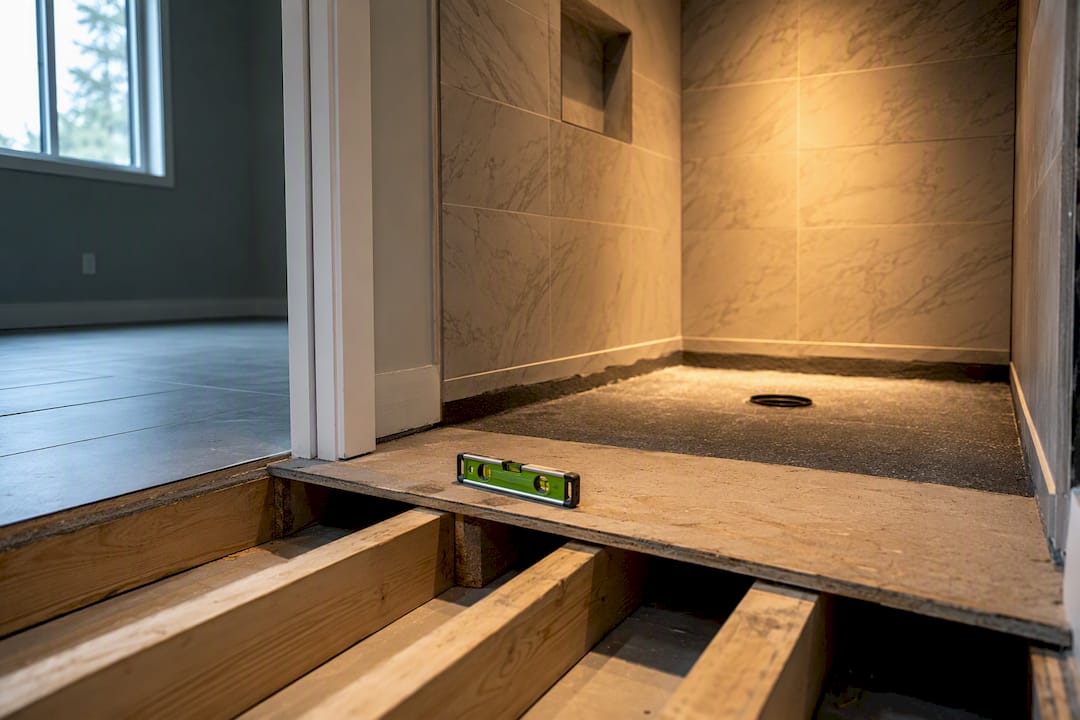
A code-compliant curbless shower keeps the threshold at ½ inch or less, slopes the floor a minimum of ¼ inch per foot to a properly sized drain, and extends waterproofing well beyond the entry line. The finished interior needs a space sufficient to encompass a 30-inch circle. Skip any one of these and the most common failure follows: water migrating past the wet zone into the rest of the bathroom.
TL;DR:
A properly designed curbless shower requires a threshold of ½ inch or less, a minimum interior of 1,024 square inches, and at least 36 inches of depth.
The floor must slope at around ⅜ inch per foot toward the drain, with linear drains being more forgiving for installation than point drains.
Waterproofing should extend at least 1 foot beyond the wet zone, and walls inside the splash area must be waterproofed to 72 inches above the drain.
Structural modifications, such as recessed slabs or dropped joists, are often needed to achieve the necessary slope and drain depth, making structural work a major cost factor.
Ventilation capacity, including appropriately placed exhaust fans and possibly maintaining partial door openings, is critical to controlling humidity without a curb.
Table of Contents
What Are the Curbless Shower Requirements Under Building Code?
Waterproofing and Wall Height: How Far Does the Membrane Need to Extend?
Does the Subfloor Need Structural Changes for a Curbless Shower?
What Maintenance Does a Curbless Shower Need That a Curbed One Doesn’t?
How DJ Custom Contracting Handles Curbless Shower Installations
What Are the Curbless Shower Requirements Under Building Code?
A curbless shower is defined by its threshold, not its style. Anything at or below ½ inch (13 mm) qualifies as zero threshold under ADA guidance, and most municipal codes borrow that same ceiling even for non-accessible residential builds. Where a small lip remains, most jurisdictions require a beveled transition between ¼ inch and ½ inch rather than a squared edge that catches a toe or a walker wheel.
Dimensionally, the numbers are less flexible than most homeowners expect. Albany, California’s curbless guidance sets a minimum finished interior of 1,024 square inches, roughly the footprint of a 30 inch circle, so a wheelchair or walker can turn inside without clipping a wall. Depth recommendations from Yorba Linda’s curbless shower standards set 30 inches as an absolute floor, 36 inches as the practical minimum, and 42 to 48 inches as the range that actually feels comfortable to use.
Threshold: ≤½ inch, beveled if any lip remains
Interior footprint: minimum 1,024 sq in / 30 inch circle
Recommended depth: 36 inch minimum, 42 to 48 inch ideal
The receptor itself also has to hold a shallow depth of water over the drain without spilling toward the entry, a containment detail called out directly in Mill Valley’s curbless shower pan guidance. Inspectors check that number because it is the difference between a shower that drains cleanly and one that puddles at the edge every time someone steps out.
How Much Slope Does a Curbless Shower Need?
Code sets the floor at ¼ inch of slope per foot toward the drain, but that minimum is more of a starting point than a target. Many wet-room installers push closer to ⅜ inch per foot for extra margin, since a slightly steeper pitch clears water faster and forgives small tiling inconsistencies that would otherwise pool.
Statistic Callout: Industry practitioners commonly recommend around 3/8 inch per foot as a practical wet-room standard, a half step above the ¼ inch code minimum, because it’s more forgiving of substrate variance without feeling uncomfortably steep underfoot.
Drain selection changes the slope math entirely. A center or offset point drain needs pitch running from every direction toward one spot, which means tile cuts get more complex the farther the drain sits from a wall. A linear drain only needs a single-direction slope, since the whole run collects water along one edge. That’s why linear drains are often the more forgiving choice for curbless layouts, particularly in larger wet rooms.
Point drain: multi-directional slope, more complex tile layout
Linear drain: single-direction slope, simpler substrate work
Add a secondary trench drain for shallow footprints or high-flow rain heads
Match the drain to the fixture load. A single showerhead rarely overwhelms a 2 inch drain, but a rain head plus a handheld on the same wall can outpace a standard drain’s capacity, which is when a second linear run earns its cost.
Waterproofing and Wall Height: How Far Does the Membrane Need to Extend?
The membrane can’t stop at the shower’s edge. TCNA and CSI methods 421C and 422C call for waterproofing to extend at least 1 foot beyond the wet area into the surrounding dry floor, and several municipal guidelines, including Yorba Linda’s, push that extent out to 4 feet depending on room layout and drain placement.
Wall finish height matters just as much as floor coverage. The common benchmark is 72 inches above the drain inlet for any wall inside the splash zone, and any glass panel bordering that wet area needs tempered safety glazing, not standard tempered-adjacent glass substitutes.
Floor membrane: minimum 1 foot beyond wet area, up to 4 feet in some jurisdictions
Wall finish: waterproof to 72 inches above drain inlet
Glass panels: tempered safety glazing required in the splash zone
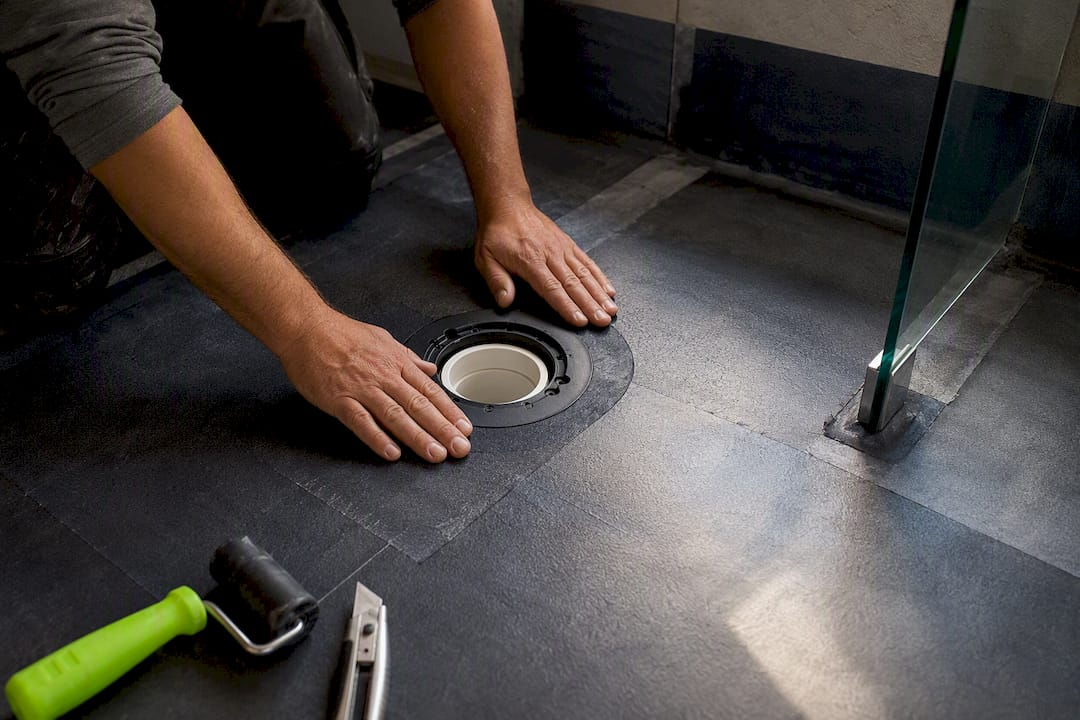
Sheet membranes and liquid-applied systems both pass inspection when installed to the manufacturer’s listing, but mixing brands or skipping a manufacturer’s specified overlap width voids that listing fast. Penetrations around drain flanges and glass panel anchors need the same overlap discipline as any seam.
Pro Tip: Ask your contractor which membrane system they’re specifying by name, then confirm the drain flange and glass anchor penetrations are detailed in that same manufacturer’s installation guide. A mismatched system is one of the fastest ways to fail a waterproofing inspection.
Does the Subfloor Need Structural Changes for a Curbless Shower?
Removing the curb means removing the framing that used to hide a slope transition, and that’s where budgets shift. On a slab, the fix is usually a recessed pour. On a wood-frame second floor, it usually means dropped or doubled joists to create enough depth for the drain flange, the mortar bed, and the slope itself without robbing ceiling height below.
Joist depth is the recurring failure point. If existing framing doesn’t leave enough room for the assembly, you either raise the finished floor, which creates a step at the doorway, or reframe, which adds cost and time.
Slab construction: recess the pour to the required depth
Wood-frame floors: drop or double joists to clear drain and mortar bed depth
Watch for floor heating layers or thick drain flanges eating into available depth
Red flag: joists too shallow to achieve slope without raising the entire floor
Structural work like this is consistently the biggest cost driver in curbless retrofits, more than tile or fixtures, because it touches load-bearing elements that can’t be improvised around.
When Do ADA Roll-In Shower Requirements Apply?
Not every curbless shower needs to meet ADA roll-in standards, but any project marketed or permitted as accessible does. ADA Accessibility Guidelines specify a 60 by 30 inch roll-in minimum, with an alternate 60 by 36 inch configuration, and the same ½ inch threshold cap under section 608.7 applies here too.
Roll-in compliance adds hardware requirements a standard curbless build skips entirely: grab bars at specified heights, control placement within reach range, and a clear transfer space next to the seat or bench.
Minimum roll-in size: 60 in × 30 in (or 60 in × 36 in alternate)
Threshold: ½ inch max per ADA 608.7
Required grab bars and reachable control placement
Linear drains tend to suit these layouts better than point drains, since consistent single-direction slope keeps the whole floor predictable for a wheelchair caster. For full sign-off on an ADA build, loop in an accessibility consultant early, before framing is set. Our ADA bathroom requirements guide covers the fixes owners most often have to make after the fact.
What Containment Options Work Without a Curb?
Containment replaces the curb’s job of keeping water where it belongs. A single return panel, typically 24 to 36 inches wide, catches spray on one side while leaving the entry open. A two-panel wrap or a larger fixed panel in the 30 to 48 inch range gives fuller coverage for rooms with more spray exposure.
Return panel: 24 to 36 inches, single-side coverage
Larger fixed panel: 30 to 48 inches for broader spray control
Under roughly 40 sq ft, a fully open wet room is often not recommended without a door or extra containment
Textured or mosaic tile with strong wet-traction ratings is standard on curbless floors, since the whole surface stays exposed to foot traffic and water. Aim the fixture away from the entry line, not toward it.
Pro Tip: A 36 by 36 inch clear entrance gives enough room for a walker or wheelchair to pass through comfortably, even in a design that isn’t formally built to ADA specs.
What Do Inspectors Check Before a Curbless Shower Passes?
Permit submittals need a plan showing slope direction and elevations, the specified membrane system, drain location, and total assembly depth from subfloor to finished tile. Skipping any of these on the drawings is the most common reason plans get sent back before construction even starts.
Inspections follow a set sequence:
Pre-membrane inspection of the framing and subfloor depth
Waterproofing verification, often a flood or water test, or a visible liner check
Temporary containment barrier in place before finish tile goes down
Final plumbing and drain flow test
The designer signs off on slope diagrams and the wet/dry boundary, while the installer and tile subcontractor are responsible for executing that plan to the letter, a division of responsibility TCNA and CSI guidance spells out clearly. Our building code compliance guide walks through the permit process in more detail.
Contractor Field Notes: What Actually Goes Wrong
Feasibility comes down to three questions before demo starts: is the floor slab or wood-frame, how deep are the joists, and what’s on the other side of that wall. The failures worth losing sleep over are insufficient membrane overlap, a drain flange set too low, wrong slope direction, and glass panel gaps that let spray sneak past the containment.
Ask contractors to name their waterproofing product and installation method, not just “waterproof membrane”
Require inspection milestones in the contract, not just a final walkthrough
Get the warranty terms for both labor and materials in writing
Small tiling tolerances cause more leaks than bad materials do. A laser-verified slope check before tile goes down, paired with a visible membrane overlap inspection, catches the problems that otherwise show up as a stain on a ceiling below six months later. Our tile installation checks guide covers the substrate verification steps worth requiring from any tile sub.
Pro Tip: Get the waterproofing inspection photographed before tile covers it. If a leak shows up two years later, that photo is the only proof of what’s actually behind the wall.
How Do You Stop Moisture Buildup Without a Curb?
A curb used to do double duty: contain water and, indirectly, help hold humidity inside the shower stall a little longer before it spread through the room, a consideration that impacts interior door clearance and swinging options, as detailed by One Day Doors & Closets of Northern California. Remove it, and warm, humid air spreads into the bathroom faster because there’s no physical break at floor level slowing airflow between the wet zone and the rest of the space.
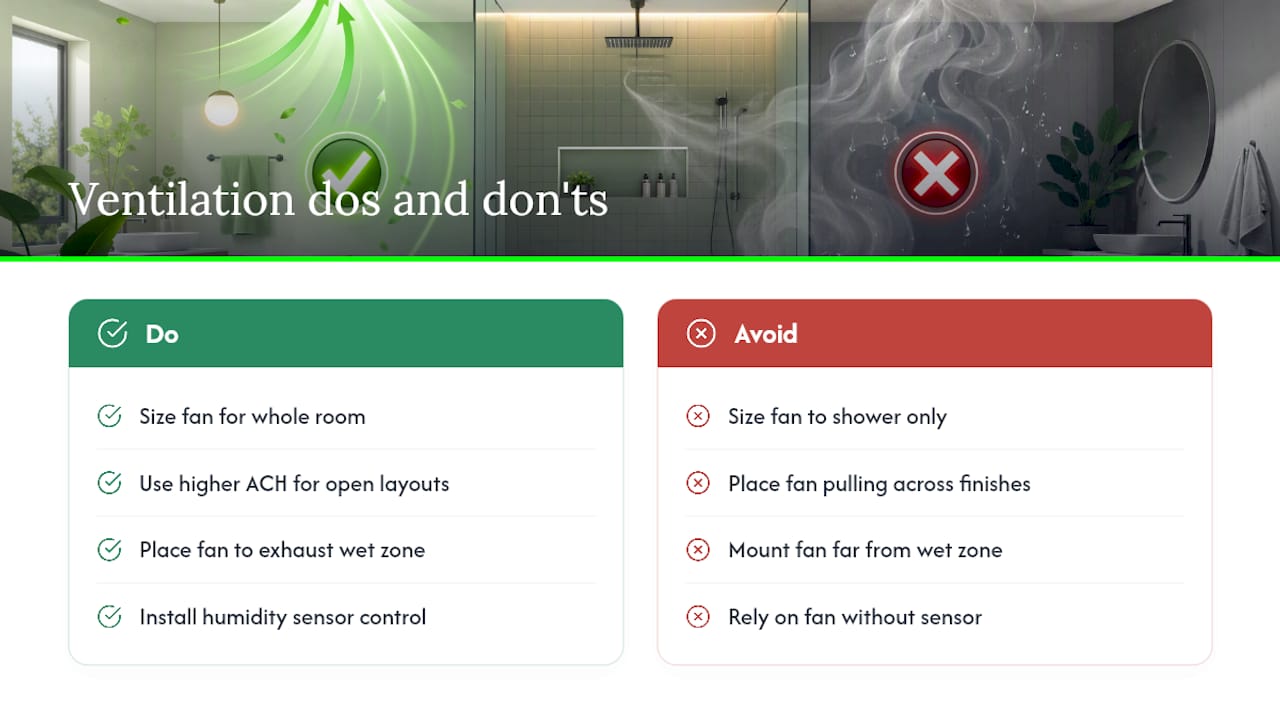
That makes ventilation capacity, not just membrane quality, part of a curbless shower’s real waterproofing strategy. An exhaust fan sized for the room’s total square footage, not just the shower footprint, is the baseline. Many codes tie fan capacity to room volume using a standard air-changes-per-hour calculation, and a curbless layout with an open wet room generally needs to size toward the higher end of that range rather than the minimum, since there’s more exposed wet surface evaporating into open air.
Placement matters as much as capacity. A fan mounted too close to the shower opening pulls moist air across finishes it should be evacuating away from, while one set too far from the wet zone leaves humidity to drift and settle on cooler surfaces like mirrors, cabinetry, and grout lines elsewhere in the room. Humidity sensors that trigger the fan automatically solve the most common ventilation failure: someone showers, turns the fan off with the light switch, and walks away while the room is still saturated.
Doorless or partially open curbless designs also change how quickly a bathroom door needs to stay open after a shower to let residual humidity clear. If the layout uses a return panel rather than a full door, don’t assume the fan alone handles it. Cracking the bathroom door for a few minutes after use helps moisture escape faster than sealed rooms relying on a single vent to do all the work.
What Maintenance Does a Curbless Shower Need That a Curbed One Doesn’t?
Drains get more attention in a curbless design because they’re doing more work with less margin for error. A linear drain’s full-length grate needs to come out and get cleared of hair and soap residue more often than a small point drain’s cover, simply because the collection channel is longer and catches more debris across its run.
Grout lines deserve a periodic look too, especially where floor tile meets the wall or where a return panel’s base track sits against the tile. That’s the seam most likely to show early wear, since it flexes slightly with temperature changes and gets constant water exposure with no curb to shield it from direct spray.
Clear drain grates and channels monthly to prevent slow drainage that backs up toward the entry
Inspect grout and caulk lines at panel bases and wall transitions every six months
Re-seal or re-caulk at the first sign of discoloration or a soft spot, don’t wait for a visible leak
Check the exhaust fan’s airflow annually, since a weakening motor raises humidity exposure on every wet surface
Waterproofing failures rarely announce themselves loudly. A slow membrane breach usually shows up as a faint discoloration on a ceiling below or a soft spot in adjacent flooring long before water is visibly pooling anywhere. Catching that early, before it reaches framing, is the difference between a caulk repair and a full teardown. Homeowners who had a structural retrofit done to install the shower have extra reason to watch these signs closely, since that same framing work is expensive to redo.
Author Perspective: Risk vs Reward of Curbless Showers
Curbless makes sense when accessibility or resale value justifies the structural cost. In a tight bathroom with shallow joists, a curbed or semi-enclosed design is usually the smarter call. Get a site assessment before committing either way.
— DJ
How DJ Custom Contracting Handles Curbless Shower Installations
A professional contractor can be the alternative to guessing your way through a curbless build. Where most homeowners are stuck piecing together membrane specs, slope diagrams, and joist calculations from separate sources, a single company might run the site assessment, structural framing, waterproofing installation, and permit coordination as one coordinated job, backed by labor and materials warranties on the finished work.

An initial consult starts with checking your existing floor type, joist depth, and drain location against what a curbless layout actually needs, then walking you through what has to change structurally versus what’s purely cosmetic. From there, you get a clear estimate before any demo starts, not a moving number that grows once the floor is opened up. If you’re weighing a full teardown against a targeted retrofit, our full gut bathroom renovation service covers both, and our broader contracting services page outlines everything from permit coordination to finish tile. Get in touch to schedule a site assessment and find out what your specific bathroom can support.
Sources
FAQ
What Are the Downsides of a Curbless Shower?
The main downsides are cost and structural disruption. Reframing joists or recessing a slab to achieve proper slope and drain depth adds expense a curbed shower never requires, and small bathrooms under roughly 40 square feet often struggle to fit a fully open design without extra containment or a door.
How Much Slope Does a Curbless Shower Need?
Code sets a minimum of ¼ inch of slope per foot toward the drain, though many installers push closer to ⅜ inch per foot for a more forgiving margin. Drain type changes the layout: linear drains need only single-direction slope, while center drains need pitch from every side.
Are Curbless Showers Legal?
Yes, curbless showers are legal and permitted under most residential building codes when they meet local slope, waterproofing, and dimensional requirements, including the ADA’s ½ inch threshold cap many jurisdictions also apply to non-accessible builds. Requirements vary by municipality, so always confirm specifics with your local building department before finalizing plans.
Does a Curbless Shower Need a Door?
Not always. Many curbless designs use a fixed glass return panel or partial wall instead of a full door, but very small footprints or high-spray fixture setups often need a door or secondary drain to keep water contained. The right choice depends on room size, fixture placement, and how much splash the layout is likely to generate.
Recommended


Comments