


Finish Drywall Right: DIY Homeowners' Plan with 12–16 in Screw Specs
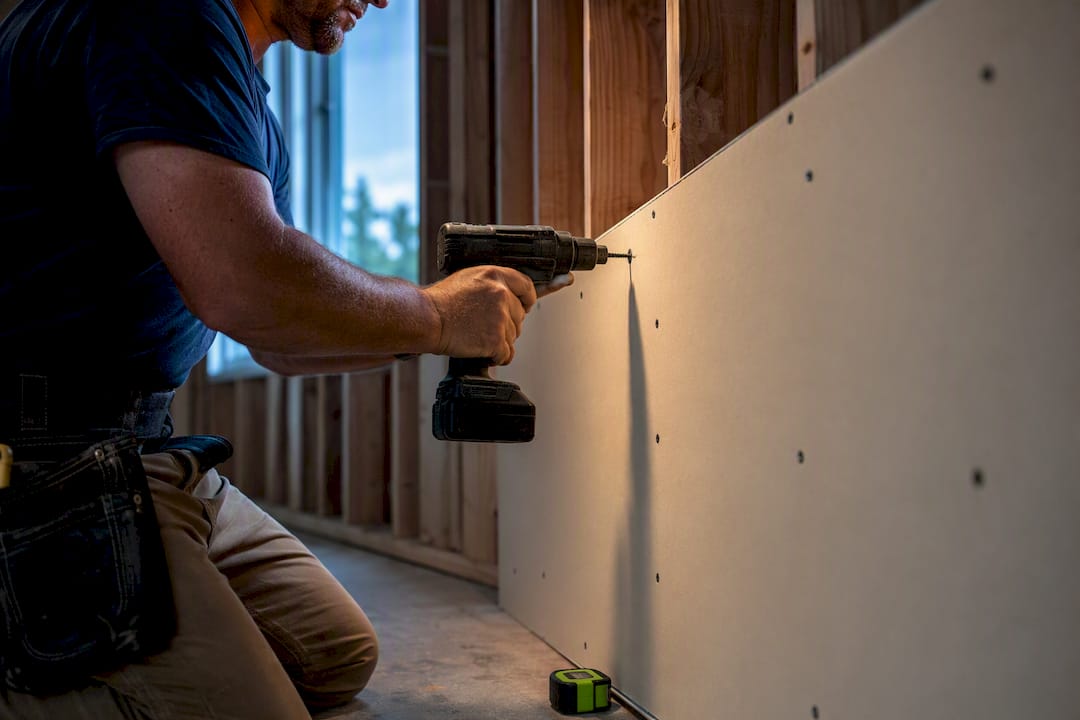
A typical DIY homeowner can complete drywall installation on a standard interior room with basic tools, a helper or panel lift, and about a weekend of working time. The process moves through five stages: prep the framing, hang the panels, fasten them correctly, tape and mud the joints, then sand and prime. Manufacturer guidance from National Gypsum and USG covers the fastening and finishing details that separate a clean job from a lumpy one.
TL;DR:
Proper fastener spacing and thin coats of mud are critical for a professional finish, reducing cracks and the need for extensive sanding.
Drying time between coats is often underestimated, and rushing this step leads to surface damage and additional rework.
Curved or irregular surfaces require thinner, flexible drywall and closer screw spacing to prevent cracking and maintain a smooth finish.
Accurate measurements and careful cuts around openings ensure clean fitting and prevent seams from crossing corners, which are common failure points.
Hiring a professional can save time and prevent costly rework, especially for larger or code-sensitive projects that involve coordinated trades.
Table of Contents
Tools and Materials for Drywall Installation
Before you cut a single sheet, get the shopping and rental list right. Missing one item midway through hanging a ceiling panel is how a Saturday project turns into a Saturday and Sunday project.
Buy these materials and tools:
Drywall panels: 1/2 inch for most walls and ceilings, 5/8 inch for garage separations or where fire-rated assemblies are required
Bugle head drywall screws (1 1/4 inch for standard 1/2 inch panels)
Joint compound (all-purpose or a lightweight taping/topping combo)
Paper or mesh joint tape
Metal or vinyl corner bead for outside corners
Drywall knives in three widths: 4 or 6 inch, 8 inch, and 10 or 12 inch
Tape measure, T-square, and a drywall saw or utility knife
Rent a drywall lift or borrow a panel lifter if you’re working alone, especially for ceilings. Round out the kit with a dust mask rated for fine particulate, safety glasses, and plastic sheeting to seal off vents and doorways.
Preparing the Room and Planning Panel Layout
Framing problems don’t disappear once drywall goes up; they telegraph straight through as bulges and wavy seams. Walk every stud and joist with a straightedge before you cut anything.
Sight down each stud bay and shim or plane any framing member that bows more than 1/8 inch
Measure wall height and plan panel layout to land seams over solid framing, not mid air
Mark stud centers and outlet, switch, and window locations on the floor and framing so you’re not hunting for them under a hung panel
Decide on orientation: horizontal hanging on walls reduces the total number of seams in a typical 8 foot room, while ceiling panels should run perpendicular to the joists for maximum support
Leave a small gap wherever drywall meets a hard surface. Some installers trim panels about 1/4 inch shorter than the measured span to ease fitting, while Lowe’s installation guidance recommends leaving roughly a 1/2 inch gap at the floor for expansion and moisture clearance. Either approach works. What matters is that you’re consistent across the room.
How to Hang and Fasten Drywall Panels
Ceilings go up first, always. Hanging the ceiling after the walls means you’re wrestling heavy panels around finished seams, and that’s a recipe for gouges. Use a drywall lift for ceiling work whenever possible. Even an experienced pair of hands tires fast holding a 12 foot sheet overhead.
Position the panel against the ceiling joists or wall studs, checking that the factory edge lands on the center of a framing member
Tack the corners first with two or three screws to hold the panel in place
Fasten outward from the center toward the edges, working in a rough grid pattern rather than jumping around the sheet
Follow manufacturer spacing: National Gypsum recommends bugle head screws spaced 12 to 16 inches apart along each framing member
Set screw heads just below the paper surface without breaking through it. A slight dimple is correct; a torn paper face is not
Fasten edges and ends carefully, keeping screws at least 3/8 inch from panel edges to avoid crumbling the gypsum core
Correct spacing isn’t a cosmetic preference. Fastening patterns exist because inconsistent spacing is the leading cause of nail and screw pops months after the paint has dried, when framing shrinks slightly and pulls loose fasteners forward.
Pro Tip: Run a bead of construction adhesive along the studs before setting the panel. Fewer screws are needed to hold the sheet flush, which means fewer dimples to fill later.
Cutting Openings for Outlets, Windows, and Doors
Getting a clean fit around an electrical box or window frame takes patience more than skill. Rushing the cutout is where most drywall damage happens.
Measure from an adjacent hung panel or from the floor and ceiling to transfer the exact outlet or switch location onto the new panel before lifting it into place
Use a spiral saw (RotoZip-style tool) for outlet and switch boxes once the panel is hung. It cuts cleanly through gypsum without needing a pre-drilled pilot hole
Score window and door openings with a utility knife along a straightedge, then snap the panel and cut through the back paper
Cut slightly inside your marked line for box openings. Trim outward with the saw rather than oversizing on the first pass. A too-large hole around an outlet box has no clean fix except a patch
Keep seams away from corners of openings wherever your layout allows. A seam that crosses directly over the corner of a window or door is one of the first places cracking shows up.
Taping, Mudding, and Finishing Drywall Joints
This is the stage that actually makes drywall installation look professional, and it’s where most DIY jobs lose points. The fix isn’t more compound. It’s thinner coats, applied patiently.
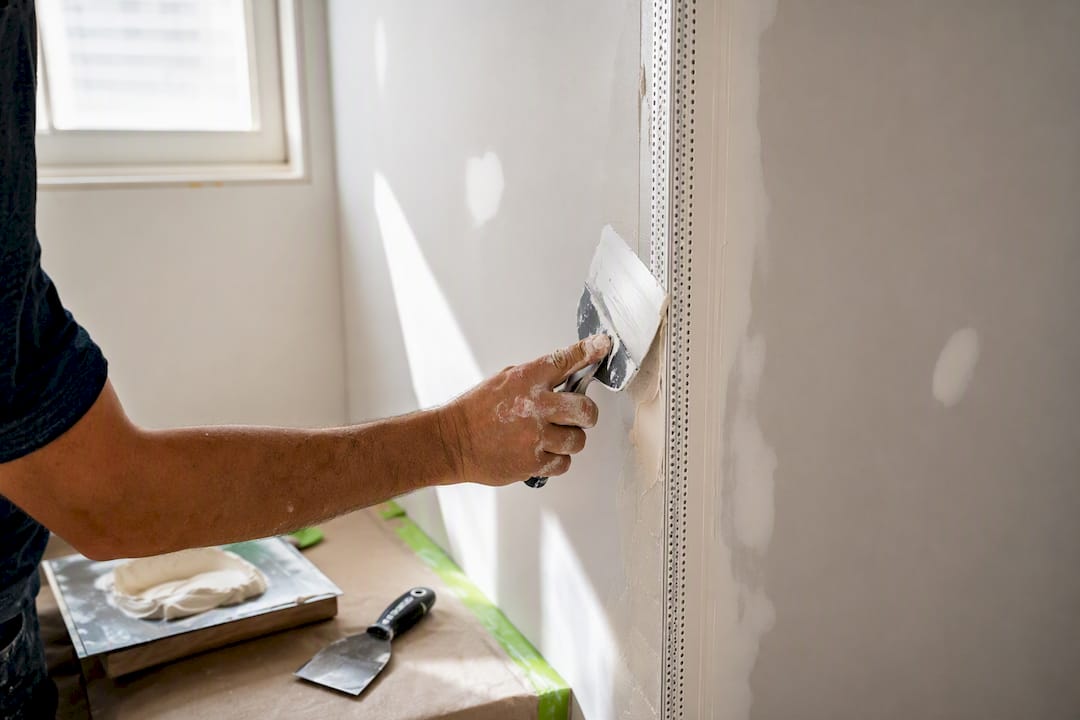
Embed the tape in a thin first coat of joint compound, pressing paper tape into wet mud with a 4 or 6 inch knife, or bedding mesh tape dry before the first mud pass
Apply a second coat with an 8 inch knife once the first has fully dried, spreading it wider than the tape to start feathering the edge
Apply a third coat with a 10 or 12 inch knife, feathering further out on each side so the joint blends invisibly into the surrounding surface
Sand only after the final coat dries completely. If earlier coats went on thin and were feathered properly, sanding is light work rather than a dust storm
USG’s installation guidance walks through corner bead application and knife progression in detail, and it’s worth a look if you’re finishing your first room. Contractors favor thin coats specifically because less compound on the wall means less sanding and fewer flaws showing through paint, which is the single biggest lesson separating amateur finish work from professional results.
Pro Tip: Skim-coat the entire wall with a thin layer of compound if the room has strong side lighting or you’re going for a showroom finish. It hides minor texture differences that flat paint would otherwise expose.
For bathrooms, basements, or any room with regular moisture exposure, use moisture-resistant panels rather than standard drywall, and prime with a product built for that panel type before painting.
Common Drywall Mistakes and How to Fix Them
Most drywall problems trace back to one of three habits: rushing the fastening, applying mud too thick, or skipping steps in the drying cycle.
Nail or screw pops: drive a new screw two inches away from the popped fastener, then remove or reset the original slightly below the surface and re-mud both spots
Small holes (under 1/2 inch): mesh reinforcing tape or a patch kit works better than filling directly with compound, since bare compound over an open gap tends to crack
Large holes (over 6 inches): furring strips behind the opening give the patch panel something to screw into, rather than relying on the surrounding drywall alone
Uneven seams: almost always caused by applying compound too thick in one pass, or skipping the feathering step between coats
From the Jobsite: Timelines and When to Call a Contractor
Experienced contractors have hung and finished drywall across residential and commercial jobs long enough to know where DIY timelines usually go wrong: homeowners underestimate drying time between coats. Budget a full day of dry time per coat in most conditions, which puts a single average room at three to four days from hanging to final sand, not one long weekend.
Coordinating trades matters too. Electrical and plumbing rough-in needs sign-off before panels go up, and HVAC vents often need protecting during sanding. For anything beyond a single room, textured ceilings, or work that touches code-regulated assemblies, bringing in a contractor usually saves more in rework than it costs upfront.
Hanging Drywall on Curved or Irregular Surfaces
Curved walls, arched openings, and angled ceilings need a different approach than flat framing, but they’re not out of reach for a patient DIYer. The key is using thinner material and working with the curve instead of forcing a rigid panel to bend.
For gentle curves, 1/4 inch flexible drywall bends far more easily than standard 1/2 inch panel without cracking. Wetting the back of a standard panel with a damp sponge or roller and letting it sit for 15 to 20 minutes can also increase flexibility enough to follow a shallow radius, though this works better for gentle curves than tight ones. Score the back of the panel lightly (without cutting through) at intervals along the curve to help it flex evenly rather than kinking at one spot.
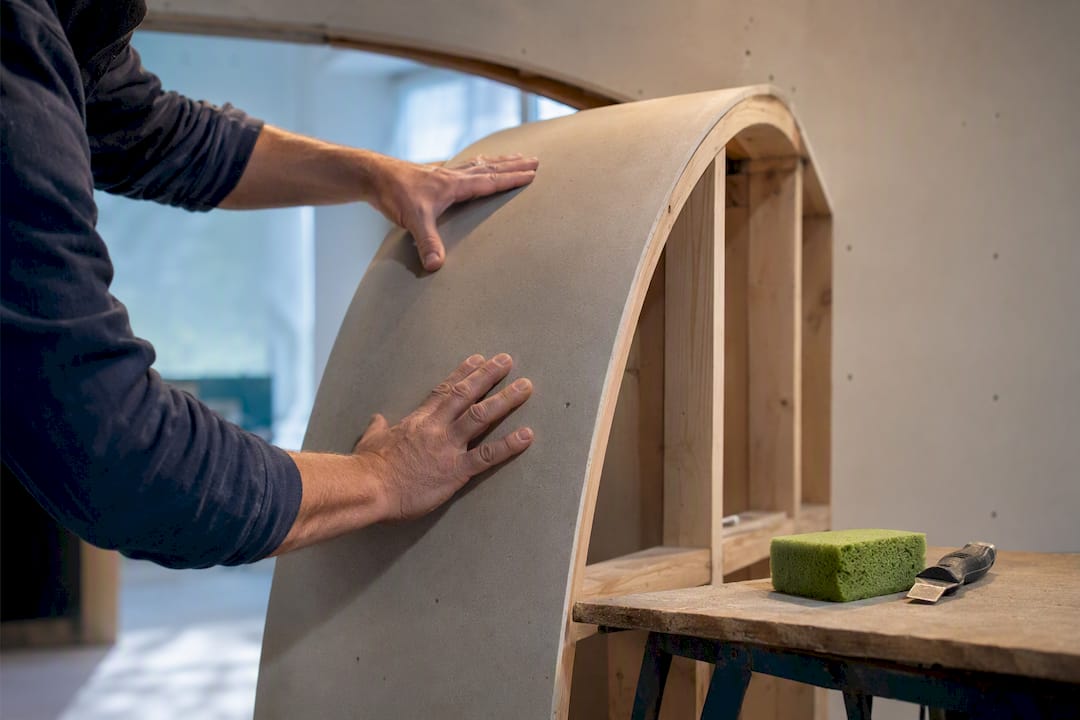
Fasten curved sections with screws spaced closer together than the standard 12 to 16 inch rule, since a curved panel under tension needs more contact points to stay flush against the framing. Start fastening at one end and work steadily along the curve rather than jumping between points, which keeps the panel from bowing away from the studs as you go.
For angled ceilings or dormer walls, cut panels to match the exact angle using a T-square set to that pitch rather than trying to trim after hanging. Irregular surfaces around chimneys, bay windows, or archways often need custom-cut pieces joined at odd angles. Plan those seams to land on solid backing wherever possible, since an unsupported seam on an irregular surface is far more likely to crack than one on a flat wall.
Finishing Inside and Outside Drywall Corners
Corners fail more often than flat seams because they take more physical abuse and because the technique is genuinely different from taping a flat joint.
For inside corners, fold paper tape along its center crease and bed it into a thin layer of compound applied to both sides of the corner at once. Run a corner trowel or a 4 inch knife down one side, then the other, rather than trying to smooth both planes simultaneously. Apply the second and third coats to each side of the corner separately, feathering each one out several inches from the joint. Sand lightly, since inside corners rarely need heavy sanding if the compound went on thin.
Outside corners need corner bead, either metal or vinyl, fastened or embedded along the edge before mudding begins. Metal bead gets nailed or screwed directly into the framing through the drywall; vinyl bead is typically set with a skim coat of compound acting as the adhesive. Once the bead is secure, mud over it in the same three-coat progression as a flat seam, feathering wider with each pass so the bead’s edge disappears under the final coat. Outside corners take more physical wear than any other spot in a room, from furniture and foot traffic, so don’t skip the third coat or shortchange the feathering here even if the rest of the wall looks finished.
Cleaning Up Drywall Scraps and Dust
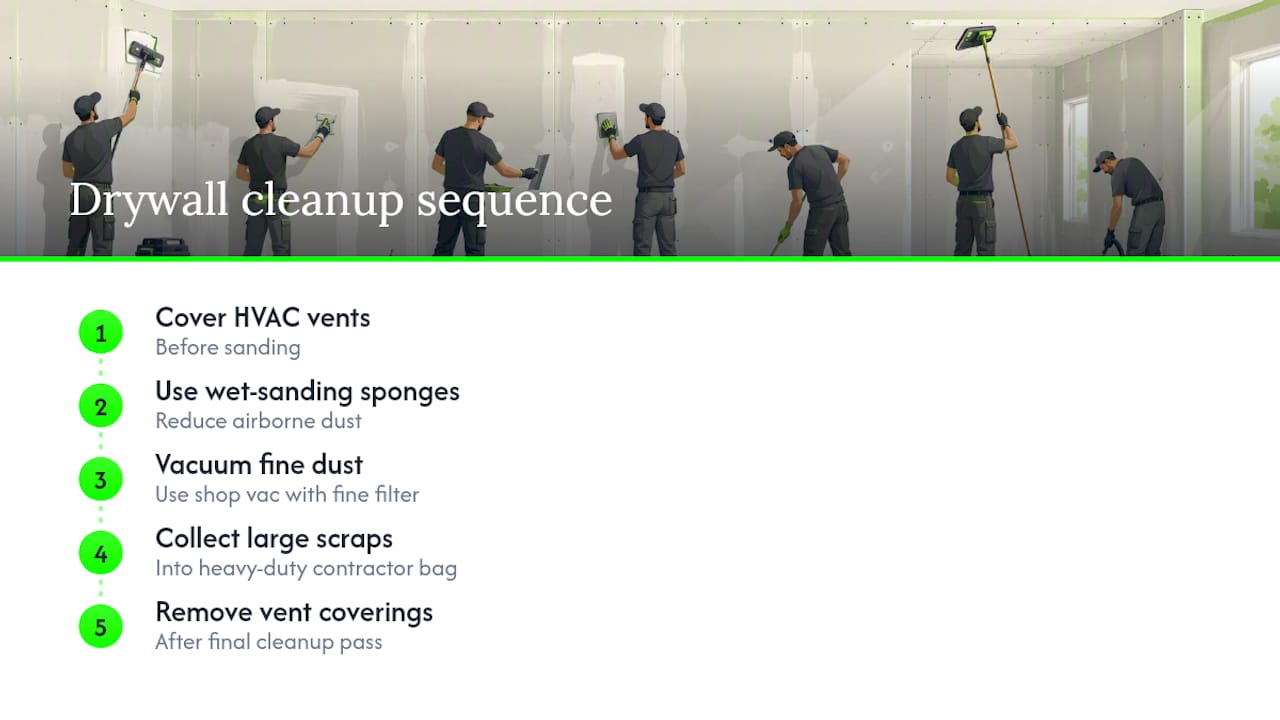
Gypsum dust settles into everything within reach, so containment matters more during cleanup than most homeowners expect going in. Wet-sanding sponges cut down on airborne dust during the finishing stage, but the bigger mess comes from cutting panels and sanding dried compound.
Sweep large scraps and offcuts into a contractor bag as you go rather than letting them pile up. Loose drywall scraps are heavy enough to tear a standard trash bag, so use a heavy-duty contractor-grade bag or, for a full room’s worth of waste, rent a small dumpster or check whether your local waste service accepts construction debris separately from household trash. Many municipalities do not allow drywall in curbside pickup because of the gypsum content, so check local rules before hauling bags to the curb.
For dust, a shop vacuum with a fine-particulate filter clears far more than a broom ever will. Vacuum before you sweep, not after, since sweeping dry gypsum dust just launches it back into the air where it resettles on every surface in the room. Cover HVAC vents and return grilles before sanding begins, and pull that covering only after the final cleanup pass, so dust already in circulation doesn’t get pulled into the ductwork and redistributed to the rest of the house.
An Editorial Take on DIY Drywall Work
The advice that circulates online about drywall installation tends to overload readers with theory: paper types, gypsum core chemistry, compound formulations. Almost none of that changes what happens when you’re standing on a ladder with a screw gun. What actually determines whether a room looks professional is discipline around two things: fastener spacing and coat thickness. Everything else is secondary.
Where conventional advice falls short is drying time. Most guides gloss over it, and most DIY frustration traces back to sanding a coat that wasn’t actually dry. Compound that looks dry on the surface can still be damp underneath, especially in humid rooms or thick applications, and sanding it early tears the surface instead of smoothing it.
If you take one thing from this guide, prioritize thin coats over speed. A homeowner who applies three thin, patient coats will out-finish one who applies two thick, rushed ones every time. The tools matter less than the restraint to use them correctly.
— DJ
Hire DJ Custom Contracting for Drywall and Interior Renovation Work
If reading through five stages of hanging, taping, and feathering told you this is more weekend than you want to give up, that’s the exact point where hiring it out saves both time and rework. Hiring a contractor is an alternative to a DIY weekend for drywall and interior renovation work: a professional who already owns the lift, knows the drying schedule, and shows up with trade coordination built in, rather than learning it mid project.

Interior renovation projects can range from a single patched room to a full gut and rebuild, with drywall work that is routinely coordinated alongside electrical, plumbing, and painting trades on the same schedule. That coordination is exactly where DIY timelines slip, since drywall has to wait on rough-in inspections and dry fully before paint goes on. Skipping a step or rushing a coat is the most common reason homeowners end up repainting a room twice.
For larger jobs, ceilings, textured finishes, or anything touching code compliance, request an estimate through the interior renovation contractor page and get a clear scope before you commit a weekend you might not get back.
Sources
Recommended


Comments