


Contractor Proven Tile Checks: L/360, ASTM Moisture, 10 ft Straightedge

Standard floor and wall tile installation is a realistic DIY project for most homeowners, provided three conditions are met first. The substrate must be flat and stable, the mortar has to match the tile type and location, and any wet area needs proper waterproofing before a single tile goes down. Skip any of these, and no amount of careful cutting will save the job. When any of the three raise structural or code questions, that’s the moment to call in a licensed contractor rather than push forward.
TL;DR:
Ensuring the substrate is flat within standard industry tolerances and free of moisture is essential, as deviations can cause tile cracking or adhesion failure.
Proper substrate preparation includes cleaning and, if needed, scuffing existing surfaces, as well as verifying moisture levels with ASTM tests before beginning.
Using the correct tools, trowel notch sizes, and back-buttering large tiles significantly improves mortar contact and reduces lippage or voids.
Structural issues like floor deflection exceeding L/360 or significant surface movement require professional assessment and repair before tiling.
Most failures stem from improper substrate prep, not tile quality, making careful surface verification and moisture testing crucial for long-lasting results.
Table of Contents
Tools and Materials You Need Before Starting a Tile Installation
A trip back to the hardware store mid-project usually means a full day lost to cure time you didn’t plan for. Get everything staged first.
For tools, you’ll want a wet saw (rent it rather than buy for a one-time job), notched trowels in a couple of sizes, a 4-foot level, a 10-foot straightedge, tile spacers, a tile leveling system, a grout float, and a rubber mallet.
On materials, the choices matter more than people expect:
Thinset mortar: modified for most floor applications, unmodified when setting over certain waterproof membranes that already provide bond strength.
Grout: sanded for joints wider than 1/8 inch, unsanded for narrow joints and polished stone.
Backer board or uncoupling membrane: required substrate layer, not optional, for tile over wood subfloors.
Waterproofing membrane: mandatory in showers and other wet areas
Wet saw rentals typically run $50 to $75 a day.
How Flat Does the Subfloor Need to Be Before Tiling?
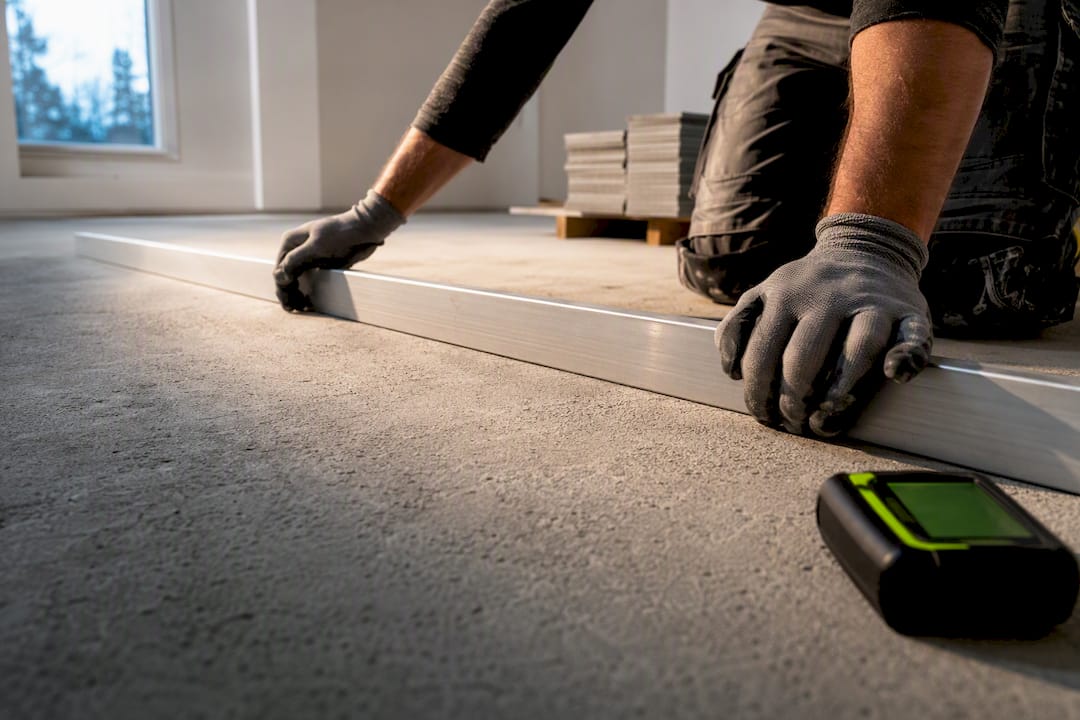
Lay a 10-foot straightedge across the floor or wall in several directions. Most tile manufacturers and installation standards call for a very small variation in flatness over a 10-foot straightedge, typically requiring the floor to be nearly perfectly flat. Anything beyond that needs self-leveling compound or a patch before you proceed.
Deflection is the other measurement that separates a durable floor from one that cracks tile within a year. The industry benchmark, set by the Tile Council of North America and ANSI, limits live-load deflection to L/360. In plain terms, a joist spanning 360 inches shouldn’t flex more than 1 inch under load. If your floor bounces noticeably when you walk across it, that’s a sign the joists may need sistering or additional blocking before tile goes anywhere near it. Most installations also need a minimum combined subfloor and underlayment thickness sufficient to meet structural standards.
Moisture matters just as much as flatness. New concrete slabs need 28 days to cure at around 70°F before you tile over them. For a faster, more precise answer, professionals rely on two ASTM tests:
ASTM F2170 (relative humidity probe): readings should be at or below 75% RH.
ASTM F1869 (calcium chloride test): results should stay under 3 pounds per 1,000 square feet per 24 hours.
Substrate problems, not tile quality, cause most DIY tile failures. A contractor-informed guide on substrate prep for coatings makes the same point: whatever goes on top only performs as well as what’s underneath it.
What’s the Right Way to Lay Out and Set Tile?
Getting the layout right before you mix any thinset saves you from staring at a sliver of tile in the most visible corner of the room for the next decade.
Find your centerlines. Measure the room’s midpoints on both axes and snap chalk lines to establish a working grid.
Dry-lay a row in each direction. Check where the cuts fall at the walls. If either end leaves a tile sliver under 2 inches wide, shift the entire layout half a tile width to balance the cuts.
Mix thinset to a peanut-butter consistency, then let it slake (rest) for the time listed on the bag, usually 10 minutes, before remixing briefly.
Match your trowel notch to the tile size. A 1/4-by-3/8-inch notch works for smaller tiles, 1/2-by-1/2-inch suits 12 to 16 inch format, and 3/4-by-3/4-inch handles large-format tile.
Comb the thinset in one direction, working in small bays you can cover before the mortar skins over.
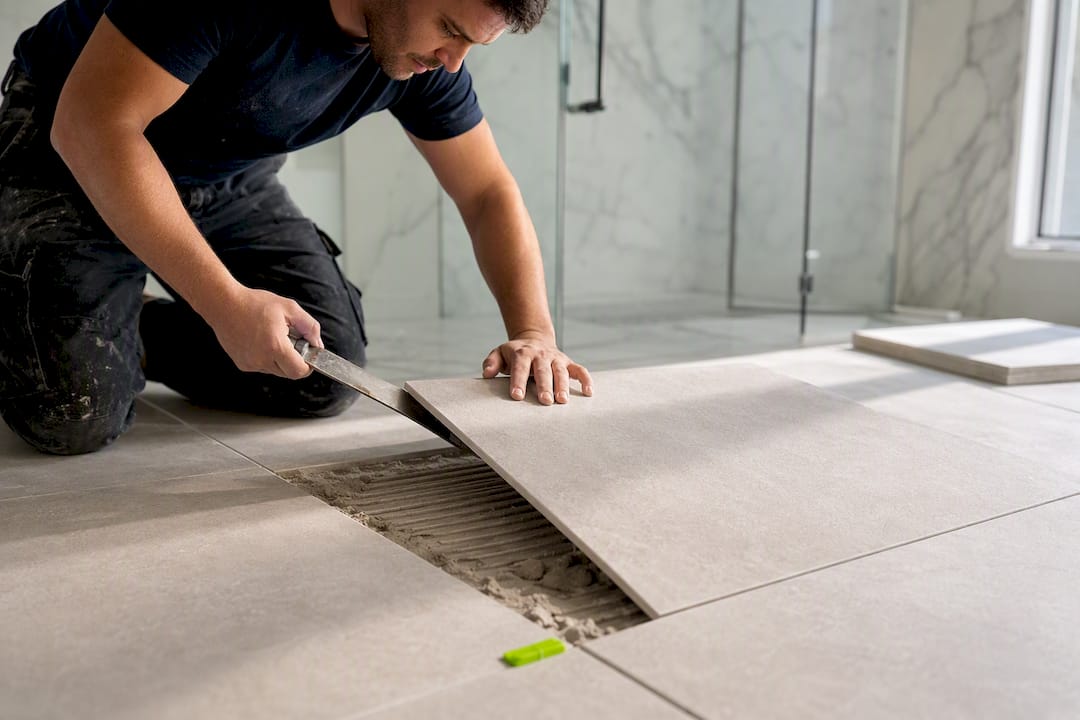
Back-butter any tile 12 to 15 inches or larger, applying a thin skim coat to the tile itself in addition to the combed floor. This is one of the most overlooked steps in thinset application, and it’s the difference between full contact and hidden voids.
Set each tile with a firm press and slight twist to collapse the ridges, then use a tile leveling system to keep the surface flush across joints.
Pull a tile periodically to check coverage. You’re targeting 80% mortar contact for interior dry areas and 95% for wet or exterior installations, per TCNA and ANSI standards.
Pro Tip: If you lift a tile and see mortar only in the ridge peaks rather than filling the valleys, your trowel notch is too small or your thinset is too stiff. Adjust before you set another square foot, not after you’ve covered the whole room.
Which Cutting Tools Work Best for Different Tile Cuts?
The tool determines the cut quality more than skill does at this stage. A wet saw handles porcelain, stone, and any complex or curved cut cleanly, since the water keeps the blade cool and the edge chip-free. A snap cutter works fine for straight cuts on standard ceramic tile and is faster for simple rip cuts. A diamond hole saw is the right call for drain openings and pipe penetrations.
For trickier shapes:
L-cuts and notches: mark both cut lines, make the straight cuts on the wet saw, then nibble away the corner with tile nippers.
Circular cuts: score the outline with a diamond blade, then complete the hole with a hole saw or grinder.
Always dry-fit every cut piece before applying thinset. A cut that’s off by 1/16 inch is easy to fix on the saw and nearly impossible to fix once it’s set.
Finish visible edges with Schluter trim strips for a clean metal reveal, bullnose tile where it’s available in the same line, or a mitered edge for a seamless corner. Transition strips handle the height difference where tile meets carpet, hardwood, or vinyl.
When Should You Grout and Seal Tile After Installation?
Grout too early and you risk shifting tiles that haven’t fully bonded. Grout too late and cleanup gets harder as thinset residue hardens in the joints.
Wait 24 to 48 hours after setting before grouting standard ceramic or porcelain. Extend that to 48 to 72 hours in cold or humid conditions, or with large-format tile that traps moisture longer underneath.
Remove all spacers first, then mix grout to a thick, spreadable paste.
Float the grout at a 45-degree angle, packing it fully into each joint rather than dragging it across the surface.
Wipe with a damp sponge in a diagonal motion, rinsing frequently, and make two or three passes as the grout sets up.
Buff away the haze with a dry cloth once the surface dries, usually within an hour of the final wipe.
Seal the grout 48 to 72 hours after grouting, giving it time to cure before sealer locks in any trapped moisture.
Caulk with silicone, not grout, at inside corners, tub and shower perimeters, and anywhere tile meets a dissimilar material. Grout is rigid; those joints move.
How Long Does a DIY Tile Job Take and What Does It Cost?
Most of a DIY tile timeline is waiting, not working. Cure times for thinset and grout force the schedule, and rushing past them is how tiles end up loose or grout ends up cracked within a season.
Day | Task |
Day 1 | Demo, substrate inspection, straightedge and moisture checks |
Day 2 | Install backer board or waterproofing membrane |
Day 3 | Dry-lay, mark layout, cut border tiles |
Day 4 | Set tile field, verify coverage |
Day 5–6 | Thinset cure (minimal activity, avoid foot traffic) |
Day 7 | Grout, wipe, buff haze |
That’s roughly a 7-day elapsed schedule for a typical bathroom floor, most of it enforced downtime rather than active labor. Materials for a mid-range bathroom tile installation cost several dollars per square foot, excluding tool rental costs. Costs climb fast once you add substrate repair, large-format tile that demands leveling systems and extra labor, or a full waterproofing membrane system in a shower. For a fuller cost breakdown, this guide to bathroom retiling costs walks through where budgets typically expand.
When Does a Tile Job Need a Licensed Contractor Instead?
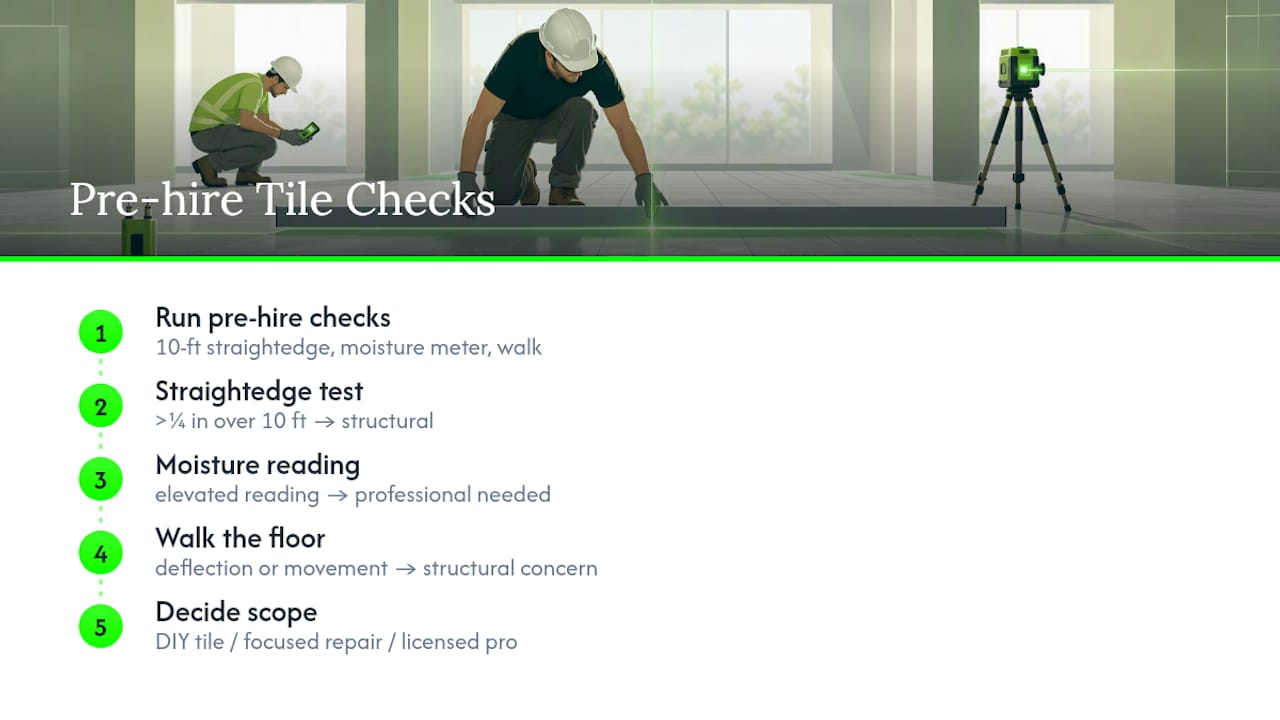
Some jobs are DIY-friendly right up until they aren’t, and the warning signs usually show up during the prep stage, not partway through setting tile. If the straightedge test reveals more than 1/4 inch of variation across a run, or the floor visibly deflects underfoot, that’s a structural question, not a tiling one. Complex shower waterproofing, drain reconfiguration, or any work that triggers a building permit also belongs with a licensed professional, since inspections can require documentation a DIY approach won’t produce.
Before hiring anyone, run the same checks a contractor would: the straightedge test, a basic moisture read if you have access to a meter, and a walk across the floor to feel for movement. Bring those results to the conversation and you’ll get a faster, more accurate quote. Homeowners don’t always need to hand over the entire project, either. A bathroom remodeling contractor can handle just the waterproofing membrane and framing corrections, leaving the tile setting and grouting to you, or provide a measurement and estimate visit before you commit to anything.
Do You Need to Clean and Prime the Surface Before Tiling?
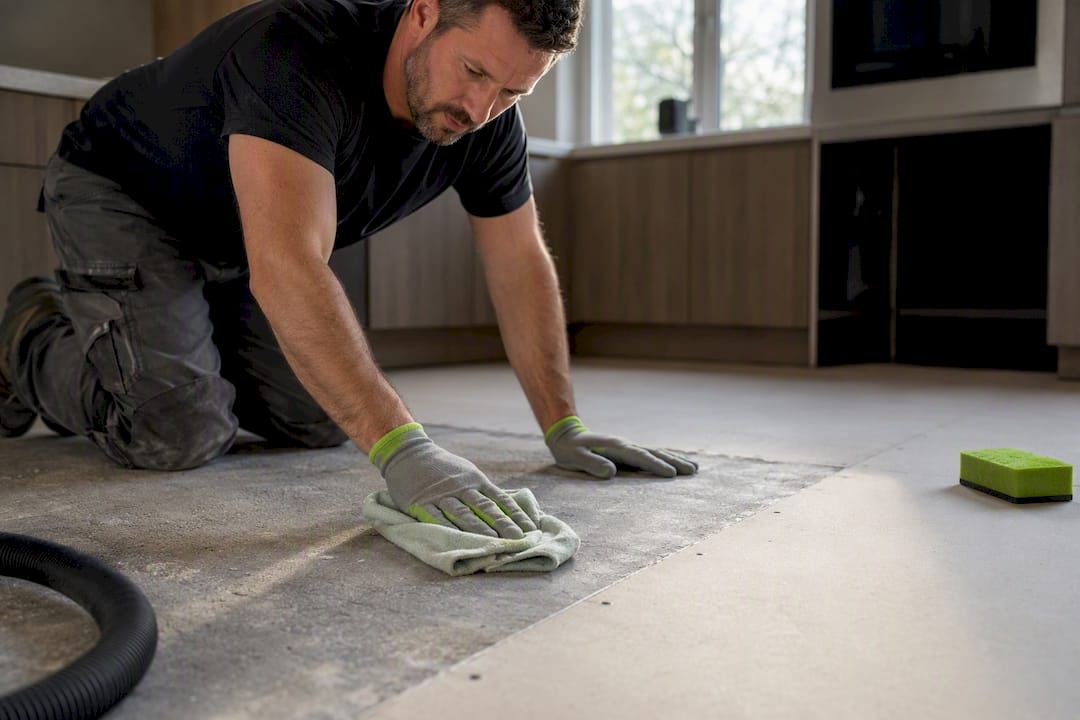
Thinset bonds to a clean, sound surface. It does not bond well to dust, grease, old adhesive residue, or paint, and skipping this step is one of the fastest ways to end up with hollow-sounding tile a year later.
Start by sweeping and vacuuming the substrate thoroughly, then wipe down backer board or concrete with a damp cloth to pull up fine dust the vacuum missed. Grease and cooking residue show up more often on kitchen floors than people expect, and a degreasing cleaner followed by a clear water rinse handles it. Let the surface dry completely before moving forward, since trapped moisture under a membrane or thinset layer can cause adhesion failures later.
If you’re tiling over existing tile or a painted surface (not generally recommended, but sometimes unavoidable), scuff the surface with sandpaper to give the thinset something to grip, and remove any glossy sealer entirely. Primer isn’t standard for most substrates, but a few situations call for it: porous concrete that absorbs moisture unevenly benefits from a concrete primer, and some uncoupling membranes specify a primer coat for proper bond. Check the manufacturer’s instructions for your specific backer board or membrane rather than assuming primer is universal.
Skipping this step to save an hour is a false economy. A clean, dry, properly prepped surface is what makes every measurement you took earlier, flatness, deflection, moisture, actually count for something.
What Safety Gear Do You Need for a Tile Installation Project?
Tile work involves more cutting, dust, and chemical exposure than most DIYers expect going in, and the injuries that show up most often are preventable with basic gear.
Safety glasses are non-negotiable anytime you’re cutting tile, whether on a wet saw or with a snap cutter, since chips fly even with water cooling the blade. A dust mask or respirator rated for silica matters more with porcelain and stone, which release fine particulate that standard mask fabric doesn’t fully block. Knee pads make a real difference on floor installations that involve hours of kneeling, and they prevent the kind of joint strain that shows up days after the project, not during it.
Gloves protect against thinset and grout, both of which are caustic enough to dry out and irritate skin with repeated contact. Keep a first aid kit nearby, since tile edges are sharp enough to cause cuts during handling and cutting alike.
Electrical safety deserves its own mention. Wet saws combine water and power tools in close proximity, so use a GFCI-protected outlet and keep the cord away from the saw’s water tray. Ventilation matters during grouting and sealing too, since some grout sealers carry strong fumes in an enclosed bathroom. Crack a window or run a fan, and take breaks if you notice a headache setting in.
What Are the Most Common Tile Installation Mistakes?
Most tile failures trace back to a handful of repeat mistakes, and nearly all of them happen before the grout ever goes in.
Skipping the dry-lay is the most common one. Homeowners eager to start mixing thinset often skip laying tiles out first, only to discover a razor-thin sliver at the far wall that could have been avoided by shifting the whole layout half a tile.
Using the wrong trowel notch size for the tile is another frequent error, usually the result of reusing whatever trowel came in a starter kit rather than matching the notch to the tile dimensions. Undersized notches starve the tile of mortar and leave hollow spots that show up as cracking months later.
Rushing cure times ranks high on the list too. Walking on freshly set tile, grouting before the thinset has firmly set, or sealing grout before it’s fully cured all compromise the final result in ways that aren’t visible until weeks later.
Skipping waterproofing membranes in showers, or assuming backer board alone handles water exposure, causes some of the most expensive failures to fix, since the damage often happens behind the wall before it’s visible on the surface.
Finally, ignoring expansion joints is an easy oversight. Tile expands and contracts with temperature, and without movement joints spaced per TCNA EJ171, large tiled areas can crack or push tiles apart at seams over time.
How Do You Maintain Tile After Installation?
New tile and fresh grout need a gentler touch for the first few weeks than they’ll need for the rest of their life. Avoid harsh acidic cleaners on freshly sealed grout for at least a week, since the seal needs time to fully cure before it can resist chemical exposure.
Long term, sweep or vacuum tile floors regularly to prevent grit from scratching the glaze, and mop with a pH-neutral cleaner rather than vinegar or ammonia-based products, both of which can degrade grout sealer over repeated use. Reseal grout every 12 to 18 months in wet areas like showers, since sealer wears down with water exposure and regular cleaning.
Wipe up standing water in showers and around tubs promptly. Sitting water is what drives efflorescence and mildew growth in grout lines, not the tile itself. Check caulk lines at tub and shower perimeters annually, and recaulk at the first sign of cracking or peeling, since a failed caulk joint is often what lets water behind the wall in the first place.
How Do You Fix Uneven Tiles, Cracked Grout, or Efflorescence?
Uneven tile, known as lippage, almost always traces back to inconsistent mortar bed thickness or skipping the tile leveling system. If you catch it within the first hour of setting, before the thinset skins over, you can often lift the high tile, add more mortar, and reset it. Once thinset cures, fixing lippage means grinding down the high edge or removing and resetting the tile entirely.
Cracked grout has two likely causes. If the cracks run in a single hairline pattern along one joint, that usually points to structural movement or a missing expansion joint. If cracks appear in patches across multiple joints, the grout was likely mixed too wet or applied too thin. Either way, dig out the cracked grout with a grout saw, vacuum the joint clean, and repack it, matching sanded or unsanded grout to the joint width as outlined earlier.
Efflorescence, the white chalky deposits that sometimes appear on grout or tile, comes from mineral salts leaching out as moisture moves through masonry or grout and evaporates at the surface. It’s usually a sign of moisture passing through from behind, not a defect in the tile itself. A stiff brush and diluted white vinegar clear light efflorescence, but recurring efflorescence signals a moisture source, sometimes irrigation or grading issues outside, that needs investigating before it becomes a bigger problem.
Why Measurable Checks Beat Guesswork on Every Tile Job
The most persistent myth in DIY tiling is that skill with a trowel is what separates a good job from a bad one. It isn’t. The research on tile failure points the same direction every time: substrate prep decides the outcome long before anyone mixes thinset. A beautifully set tile over an out-of-flat, undertested subfloor is still a failed installation, just one that takes longer to show it.
Conventional DIY advice tends to skip the numbers entirely, telling readers to “make sure the floor is level” without ever mentioning L/360 deflection or what a 10-foot straightedge actually reveals. That vagueness is where most DIY tile jobs go wrong. Readers who take the measurable standards seriously, checking flatness, verifying moisture readings, and pulling a tile to confirm mortar coverage, end up with results that hold up for decades rather than seasons.
If there’s one place to spend extra time, it’s substrate verification, not tile selection. Get that right, and the rest of the project is mostly patience.
— DJ
Get Professional Help for the Parts of Tile Installation That Carry the Most Risk
A licensed contractor is the practical fallback when a DIY tile project turns up a problem bigger than a trowel and a level can fix, structural deflection, a failed moisture test, or a shower that needs a full waterproofing membrane system rather than a patch job. Where a general contractor search leaves you guessing at qualifications, some contractors have handled interior renovations, waterproofing, and code compliance work since 2018, with experience across both residential and commercial projects.

That matters most in wet areas, where a mistake stays hidden behind the wall until it’s expensive. If your straightedge test or moisture reading flagged an issue, or the scope of the job now involves permits or DOB compliance, Djcustomcontracting’s bathroom remodeling services can take on the waterproofing and substrate correction while you finish the tile yourself, or handle the entire project start to finish. For commercial properties facing similar tile or maintenance issues at scale, the commercial renovation team handles multi-unit and facility-wide work under the same code-aware approach. Reach out for a measurement and estimate before your next cure-time deadline forces a decision.
Sources
Recommended


Comments